The Only Cantilever Racking Installation Guide You’ll Ever Need
Are you dealing with awkward shaped goods and aren’t able to find a good storage system?
Some racking systems are too small while others are not sturdy enough to withstand the weight of your goods?
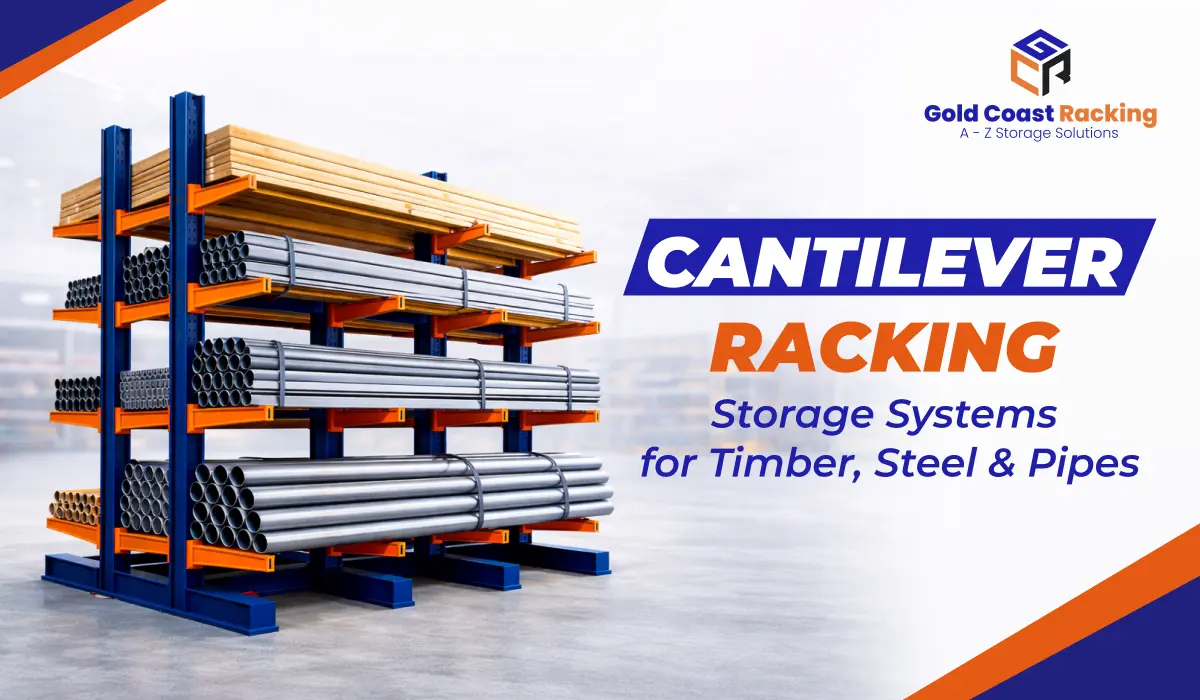
Well, then you might want to explore cantilever racking. With it, you get heavy-duty material with open-front designs, providing a perfect storage space for your irregular-shaped goods.
The first step towards transforming your warehouse is getting a cantilever system installed. You can either opt for professional help, or you can do it yourself.
Thinking about going for the DIY option and confused how to do it? Read on to know everything you need to about cantilever racking installation:
Key takeaways
- Proper load assessment ensures cantilever racks safely support materials without risking structural damage or failure.
- Accurate floor preparation and anchoring are essential for stability, safety, and long-term reliability.
- Correct upright alignment maintains structural integrity. It ensures even weight distribution across the entire racking system.
- Following manufacturer guidelines reduces installation risks and ensures compliance with important safety standards requirements consistently.
- Regular safety checks and proper installation improve durability, efficiency, and overall warehouse storage reliability significantly.
Understanding what cantilever racking is made of
Diving directly into the assembly process without knowing what the system is made of can be a big mistake. Hence, you need to have a clear understanding of all of the cantilever system’s components.
Here’s all the parts a cantilever racking has:
1. Base
This is the foundation of the racking system. Heavy duty cantilever racking requires a strong and stable base as it is the one holding the entire system together.
The base is bolted firmly onto the floor with the uprights attached afterwards.
2. Uprights
These are vertical columns on which the arms of the racking are connected. Two uprights make up one bay.
Uprights are securely connected with the base and also with each other for additional stability. They can either be one-sided or double-sided.
3. Arms
These are the star performers and the reason behind choosing heavy duty cantilever storage racks for your storage needs. They’re attached to the uprights and extend horizontally.
They come in various different types like straight, inclined, pin-type, bolted etc to assist your specific needs.
4. Braces
Braces are used to connect two uprights to make the racking even more stable and sturdy. They ensure that your cantilever racking system remains secure under heavy loads.
And if you’re dealing with longer uprights or heavier weight loads, you can use cross bracings as well. They provide extra support to bear heavier weight loads safely.
Pre-installation checklist
A heavy-duty cantilever racking will be holding a large amount of heavy-weight goods. Hence, installing it requires careful assessment of the existing layout and floor space.
You need to make sure that there are no possibilities of any major accidents or injuries happening in the future. Here’s how you can ensure long term safety:
1. Assess your storage unit’s needs
You are going to be dealing with goods of different types, length, and weight. For this reason, different types of cantilever racking offer different types and options customized according to your specific needs.
To ensure you choose the right customisation, you need to know the exact load specifications of your goods.
2. Think about your layout
One of the most important steps before starting the installation process is to thoroughly examine the floor’s load bearing capacity. Then comes the ceiling height, forklift height, and aisle width of your storage unit.
To deal with all these factors smoothly, ensure beforehand that there is enough vertical space for loading and unloading of goods and comfortable movement of the forklift.
3. Following safety regulations
The safety of your team should always come first, even more so during the installation process. That’s because there are chances of minor accidents happening if the process is not done correctly.
Make sure that everyone uses protective gear. Also, keep in mind the safety regulations of the government. Check for load rating labels, safety clearances, and anchoring requirements.
Step-by-step cantilever racking installation guide
You might think that installing a cantilever system is a tough task, but fortunately, that’s not the case. In fact, it turns out to be quite smooth once you get the hang of it.
Here’s how you can approach the process to make it simpler:
Step 1: Marking the place
The biggest confusion you might face during the installation place can be with the exact spot to fix the base. To avoid this, you need to start by measuring the space accurately.
After careful calculations, mark the exact positions where the bases and uprights will be installed. Precision and clarity at this early stage of cantilever rack installation ensure safety and significantly lesser complications.
Step 2: Fixing the base
Once the exact locations are marked, start by placing the base on them. After being satisfied with the placement, bolt them to the floor.
To avoid any complications later, use appropriate anchor bolts to secure the base firmly into the concrete floor. Use steel shims under the base to ensure the column is perfectly plumb (vertical) before tightening the anchors.
Step 3: Bolting in the uprights
Once the base is secured, carefully place the uprights onto them and align them vertically. Check the alignment using a level to ensure they are straight.
Warehouse cantilever rack installation process requires precise upright alignment. Properly secured uprights form the main support structure and are important for long-term stability.
Step 4: Attaching the braces
Now, start installing horizontal and diagonal braces between the uprights to strengthen the overall structure. Secure each brace firmly using bolts and double-check connections.
These braces are going to give your racking system additional support and strength. Ensure they are connected firmly with the uprights at both the sides.
Step 5: Securing the arms
The last step of the installation process is attaching the arms to the uprights. Rack alignment and leveling with the arms is crucial.
Hence, ensure each arm is properly aligned and locked into position. Also, secure them tightly using the recommended fasteners.
Safety tips for installation
If you follow the above steps carefully, you can smoothly complete the process of installation. But a little extra safety has never harmed anyone. Keep the following things in mind during the installation:
1. Follow the manufacturer’s guide: This guide should be carefully read and implemented to the smallest detail. It helps in correct assembling and safety compliances.
2. Use safety gears: Cantilever racking safety standards for installation require use of Personal Protective Equipment (PPE). They serve as essential protection in case of accidents.
3. Make sure to have a partner: Do not attempt to do everything on your own. Have helpers around and do not hesitate to get an opinion from an expert.
Conclusion
The primary benefits offered by a cantilever racking system are to transform your storage units.
But the real challenge is to install it at the right place and in the right way.
Though the installation can be done by you, you need to be extremely careful of all the factors surrounding the process. Hence, it is advised to take help of a professional service.
At Gold Coast Racking, we not only provide high quality cantilever racking systems, but also offer expert consultation and installation services.
Visit our website now and book your free consultation call today!
Frequently Asked Question
1. What is cantilever racking used for?
Cantilever racking is used to store long, bulky, or irregularly shaped items. It is ideal for materials such as pipes, timber, steel bars, furniture, and construction materials.
2. How long does cantilever racking installation take?
The installation time depends on the size, layout complexity, and number of racks being installed. Small setups can take a few hours, while larger setups may take one to three days.
3. Can cantilever racks be installed outdoors?
Yes, cantilever racks can be installed outdoors if they are made from weather-resistant materials like galvanised or powder-coated steel.
4. What safety standards apply to cantilever racking installation?
Cantilever racking installation must comply with AS 4048-2023 Steel Storage Racking Standards. These standards cover load capacity, anchoring, structural integrity, and safe installation practices.